If you look around at the beginning of a club ride you will notice that many of the riders have bought into GPS data recording and navigation for their rides.
Garmin is a world leader in GPS navigation and it dominates the market for GPS devices for runners and cyclists. It's fantastic to think that a technology that was once only available to the military, air traffic and vessel routes is now available for a few hundred dollars in a package smaller that a cigarette pack.
I switched to a Garmin Edge Touring Plus coming from an Oregon 300 (also made by Garmin), which was mainly designed for trekking (my Oregon is now somewhere between Mexico and Cuba- RIP).
The Touring Plus - I have used it for a little over a year - is designed and marketed for...you guessed it: touring.
This model has a unique feature: creation of impromptu roundtrip routes (not seen before on the Garmin fitness lineup). Although, I stopped using this function because it’s unreliable. In theory, this was the most interesting (I thought anyway) function: the quick creation of roundtrip routes from the unit itself. To do so you would simply specify how long a ride you’re looking for (you can even set parameters to minimize elevation), are you are presented with 3 options of roughly that distance. I think (and many other users feel the same) that Garmin oversold this functionality.
Who is it for?
If you are entering GPS navigation it is probably a safe buy. If you like bike touring and training data is not a priority, you are probably looking at the right tool.
So, rather than telling you all of its functions (or missing functions) I will tell you how I use it when I plan a ride on one of our tours.
Plan the ride:
I don't use the Garmin or their online software called Garmin Connect. I like to design a route that I have never done before using RidewithGps or Googlemaps, which are both free (if you wish, you can upgrade to a Premium RidewithGps account).

With RidewithGps I can also browse rides in the area that I am interested in and that other users have uploaded and shared.
Before diving into the next step, let me explain the difference between a Course, a Route and a Ride (or Track).
A Course is a virtual itinerary that is saved on your computer or on your Garmin device and which you likely intend to follow on your ride. A Route is a slightly different thing. It is an ordered list of waypoints or places you have to go by, but between them the path you follow is not preset and can vary. A Route is the ride that you designed in the step above, but it could be unreliable because untested or not 100% accurate if the road phisically changed (think about a new roundabout that is not shown on Googlemaps or a detour due to road construction).
A Ride (or Track in GPS lingo) is what you register while riding. Your actual path. You will likely register a Ride while following the Course that you have uploaded on the device. On to the next step.

Saving the course and saving it to your device:
Design your course by linking points and places with your tool of choice. Again, there are online tools that replaced all Garmin resident programs such as BaseCamp. Go on Garmin Connect, Googlemaps, RidewithGps, or Map my ride and spend some time to find the one you like best.
You will then Save and Export the file you created to the memory of the Garmin. I recommend using the internal memory if asked to chose because I like having the SD card for maps only.
Save as GPX files and you won't have any issues with compatibility.
I don't use turn by turn navigation (think about your car GPS Navigator) if I can avoid it. The thing is that If you are using a good map of the area your device might force turn by turn navigation.
I am not a fan of turn by turn navigation for several reasons:
- The display of a Garmin Edge is not meant for it.
- I don't want to have issues (especially while working) with maps that are not updated.
- If a client wants the GPS file (no matter the device) a GPX file (file extension .gpx) will transfer without a glitch.
- I have more battery life with "breadcrumb navigation."
- I can follow a GPX-saved course with or without map software for the region.
In other words, I have my system set up to keep it simple and reliable. Garmin engineers understandibely want to look smart, but that complicates the actual usability.
I save the file with the usual dialog box of my computer and (with the Garmin attached and available as an external memory device), I locate the folder called new files.
Once saved there, the file will be readily available as a Course (saved in a Garmin format with extension .fit) the next time you turn the device on. Again, save it and the Garmin will present it in the list of Courses when you are scrolling through them.
This is the only system that I foud it always works and that does not have compatibility issues.
Ride:
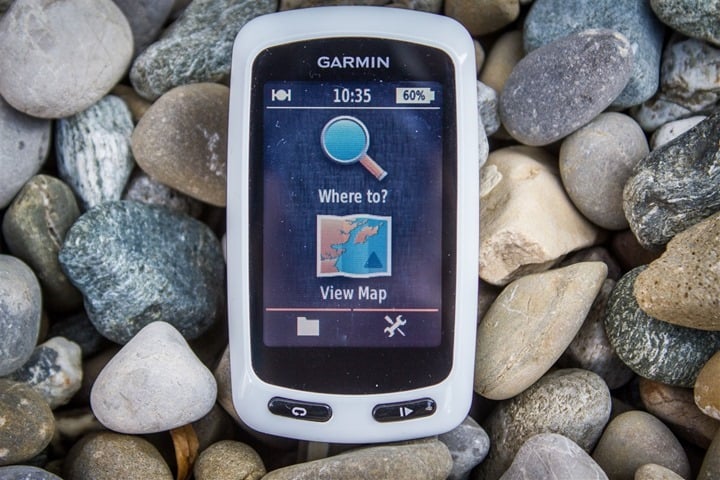
After you turn on your device and satellite reception is completed you are about to start a Ride. Here are the steps:
- Hit "Where To?"
- Hit “Saved"
- Scroll and find your Course (the name might be different in lenght so always save a file in a way that the first 5 characters will allow you to identify it).
- Hit "Ride." Once 100% of the Course is created you will be prompted with "Ready to Ride."
I keep the zoom at 300ft and I zoom in and out as needed. Crossing a town I might want it at 80ft.
While riding, you can scroll through different views (up to 6) that can be personalized with data that are more relevant to you.
There are the 3 views that I use the most: map with the course, trip computer, elevation chart.
This picture shows what I decided to show on the trip computer:

When finished, you can stop recording (bottom right button) and decide to Save or Discard.
Now, let's say you want to do the very same ride the next week. There are several ways to do this but what I suggest is to choose Saved and to locate the Ride by Date in that folder. Hit Ride: the file is converted into a Course and you can start the ride.
So, this is as straightforward as it gets. If you want to tech bully me, fine. But what I described works and has been proofed on many days of bike tours and ride research. Keeping it simple is not easy because you are often tempted with all the bells and whistles. I wish Garmin would keep it simple for touring pourposes.
Tourissimo relies on GPS navigation for its bike tours and riders also receive a map with ride info, guides phone numbers, highlights of the day.
Update: We switched to the Edge 820 Explore model because the model in this article was no longer available from the Italian importer. Many things on this article still apply. However, I plan to write an article comparing the two.